公司的设计图稿等全部存在 Gitlab 上的某个仓库中,恰好某次迭代需要使用到其中的图稿,因为历史图稿使这个仓库异常大,而我只需要其中很小的一部分,就不想 clone 整个仓库而只想下载需要的文件夹。但是在使用 Git 时如果只想下载其中部分的文件夹是一件很复杂的事情,尝试了各种指令后发现无论如何都要先 fetch 整个项目,而下载其中的一个文件却是一件简单的事情,那不如就动手写个爬虫吧。于是就有了这个项目 gitlab-fileDownload:
准备
本项目利用 axios 处理 http 请求,利用 cheerio 解析 HTML。确定用户名、密码等基本配置项:
1
2
3
4
5
6
7
8
9
10
11
| {
url: '',
username: '',
password: '',
deep: true,
path: './downloads',
cookie: {
value: '',
expires: 0
}
}
|
然后设置了模拟真实环境的请求头,并开启 withCredentials 以具备获取 cookie 的能力:
1
2
3
4
5
6
7
8
9
| const $http = axios.create({
withCredentials: true,
headers: {
'User-Agent': 'Mozilla/5.0 (Macintosh; Intel Mac OS X 10_12_4) AppleWebKit/537.36 (KHTML, like Gecko) Chrome/58.0.3029.110 Safari/537.36',
'Accept': 'text/html,application/xhtml+xml,application/xml;q=0.9,image/webp,*/*;q=0.8',
'Accept-Encoding': 'gzip, deflate',
'Accept-Language': 'zh-CN,zh;q=0.8,en;q=0.6,zh-TW;q=0.4',
}
})
|
登录
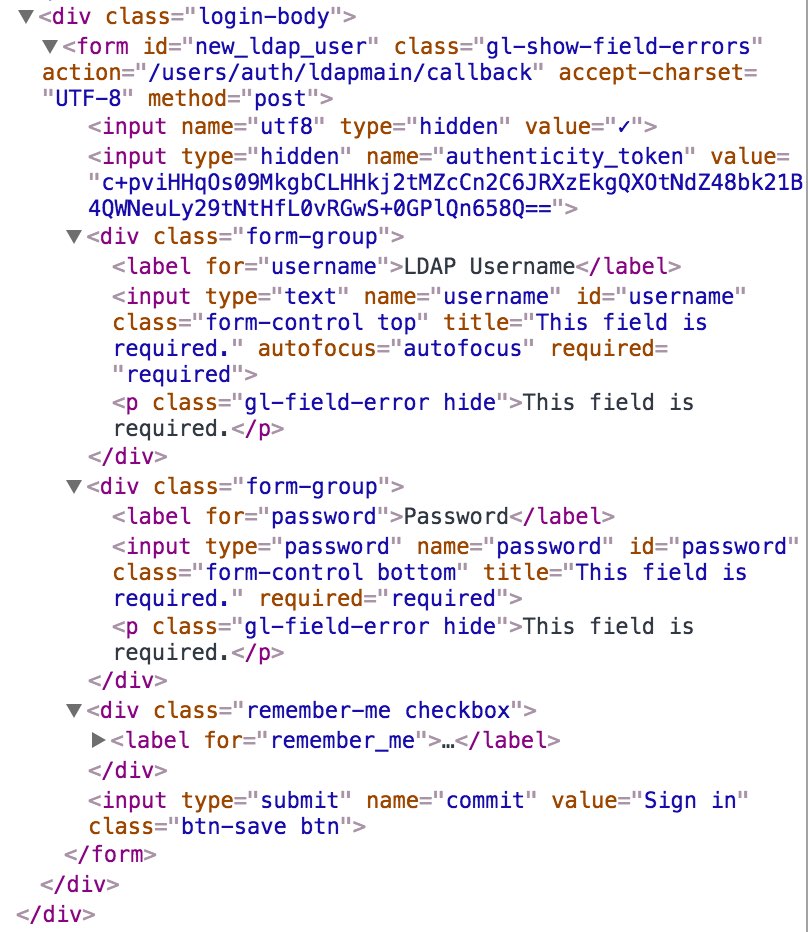
首先要处理的就是登录:
1
2
3
4
5
6
7
8
9
10
11
12
13
14
15
16
17
18
19
20
21
22
23
24
25
26
27
28
29
30
31
32
| try {
const { urlOrigin } = this.opts
const urlSignIn = `${urlOrigin}/users/sign_in`
const resPageSignIn = await $http.get(urlSignIn)
this._writeCookie(resPageSignIn.headers)
const $ = cheerio.load(resPageSignIn.data)
const $form = $('.login-body form')
const action = $form.attr('action')
const method = $form.attr('method')
const params = {}
params.utf8 = $form.find('[name="utf8"]').attr('value')
params.authenticity_token = $form.find('[name="authenticity_token"]').attr('value')
params.remember_me = 1
params.username = this.opts.username
params.password = this.opts.password
const reqOpts = {
maxRedirects: 0,
headers: {
Cookie: this.opts.cookie.value,
'Content-Type': 'application/x-www-form-urlencoded',
'Content-Length': JSON.stringify(params).length
}
}
const resLogin = await $http[method](`${urlOrigin}${action}`, qs.stringify(params), reqOpts)
this._writeCookie(resLogin.headers)
return resolve()
} catch (e) {
console.error('Error On Page SignIn: ', e)
return reject(e)
}
|
根据页面的表单获取需要发送的元素,并且把获取到的 cookie 使用存起来,以后根据 expires 决定是否需要更新 cookie。这里的登录成功后会返回 302 重定向至目标页面,如果没有处理的话会被当做错误在 catch 中处理,为了方便(偷懒)。在 axios 的初始化设置中增加了 302 为成功。
1
2
3
| {
validateStatus: status => (status >= 200 && status < 300 || status === 302)
}
|
解析页面
在登录后就需要解析目标页面的数据了,因为可能会遇到文件夹的情况,因此在开始的配置项中增加了 deep 决定是否深度解析文件夹的能力。
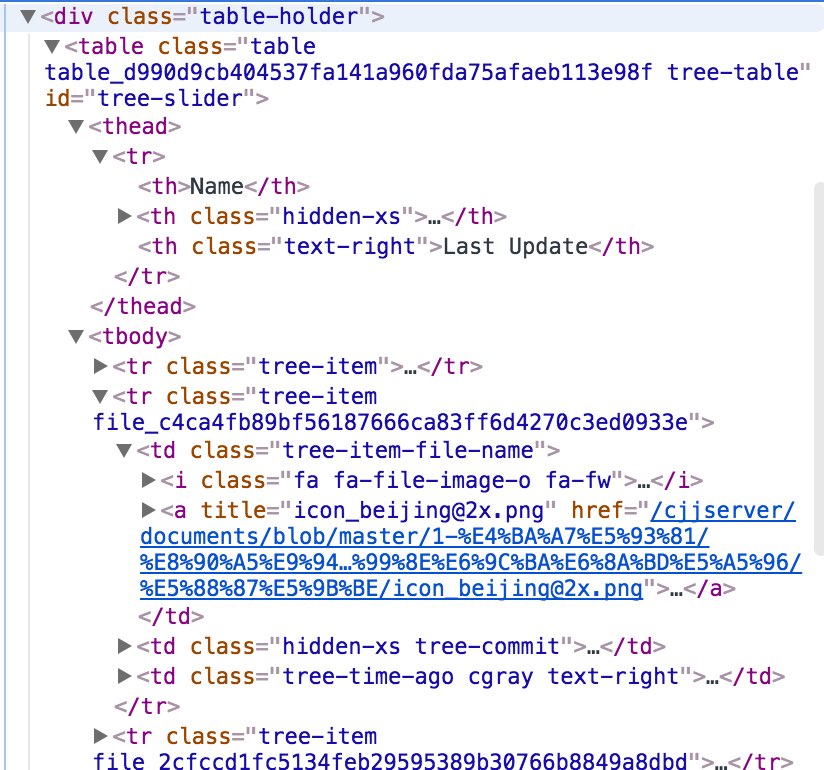
根据页面的结构存储对应资源的名称、下载路径及所在目录地址,根据 deep 决定是否递归:
1
2
3
4
5
6
7
8
9
10
11
12
13
14
15
16
| const $files = $('.tree-table .tree-item .tree-item-file-name a')
const dicts = []
for (let i = 0; i < $files.length; i++) {
const $file = $files.eq(i)
const name = $file.attr('title')
const url = `${this.opts.urlOrigin}${$file.attr('href').replace('/blob/', '/raw/')}`
if (!name) continue
if (!url.includes('/raw/')) {
if (this.opts.deep) dicts.push(...await this.getDict(url, `${dirname}${name}/`))
continue
}
dicts.push({ name, url, dirname })
}
|
下载资源
在获得了所有的资源后便是进行爬取资源并写入硬盘的操作,这里使用了同步下载,因此又是一个递归操作(懒得缓存一个箭头函数并且调用了,因此需要注意 this 的使用):
1
2
3
4
5
6
7
8
9
10
11
12
13
14
15
16
17
18
| _download(dicts) {
const root = this.opts.path
const count = dicts.length
const headers = { Cookie: this.opts.cookie.value }
return (async function downloadFile(source) {
const dirname = `${root}${source.dirname}`
if (!fs.existsSync(dirname)) mkdirSync(dirname)
const { data } = await $http.get(source.url, {
responseType: 'stream',
headers,
})
data.pipe(fs.createWriteStream(`${dirname}/${source.name}`))
if (!dicts.length) return
return downloadFile(dicts.shift())
})(dicts.shift())
}
|
其中在保存文件的时候需要检测是否存在文件夹,并且按需进行创建:
1
2
3
4
5
| function mkdirSync(filepath) {
if (fs.existsSync(filepath)) return
mkdirSync(path.dirname(filepath))
fs.mkdirSync(filepath)
}
|
结语
随后为了更直观的观测进度又增加了命令行的可视化输出,这一部分及项目的完整代码可以访问 Github 仓库查看。
另外思考一个问题,本项目中使用的全部是同步代码,而没有利用异步去处理。其中可以优化的地方就是在解析资源的同时爬取并写入硬盘,但是在变更为异步代码的过程中发现同时发起请求会导致服务器错误,而最小的间隔需要控制在 100ms 左右,当手动控制每 100ms 发起一次请求时却又发现此时的总任务时间慢于同步爬虫,因为受实际网速影响可能下载一个资源会小于 100ms,因此最终没有采用异步的方法。